Hi guys, it’s Cristel. You may know from my previous post that I’ve decided to switch from retailing to something more human-oriented, such as nursing....
Key findings: How many people attend college in the United States? The answer might seem straightforward, but it reveals complex trends shaped by age, race,...
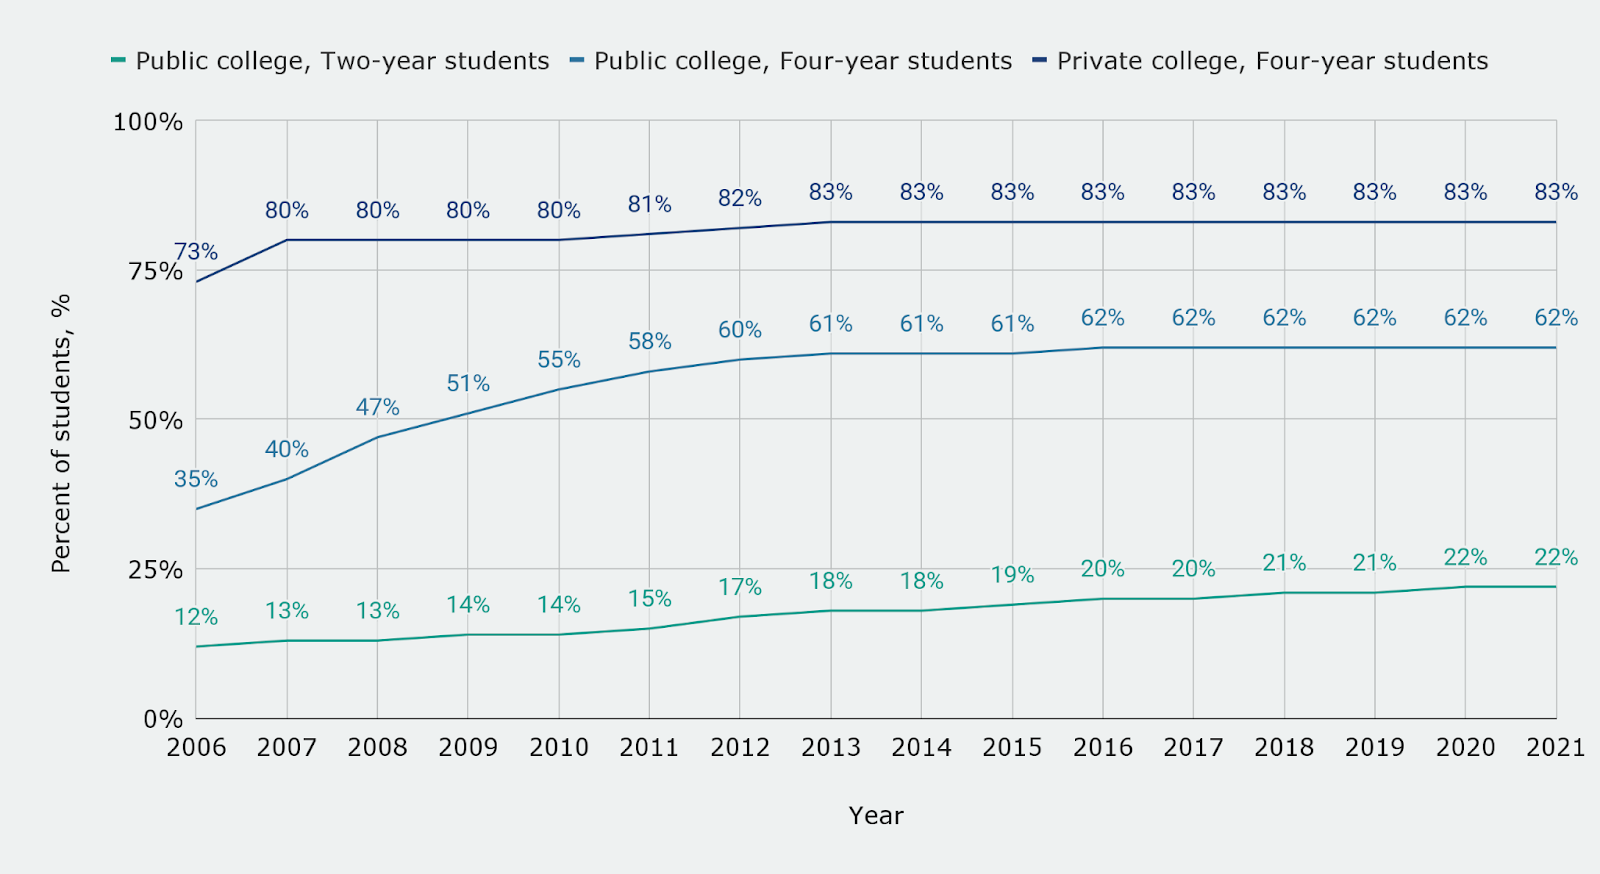
Key findings: How many students receive the President’s Education Award? While this distinction highlights a small group of top-performing students, millions more rely on financial...
Functional gastrointestinal disorders (FGIDs) affect millions of people, yet they’re often misunderstood or minimized because they don’t always show structural changes on tests. The Rome...
Picture by Alena Darmel from Pexels Economics essay writing can often feel boring and overwhelming. Beyond meeting specific requirements for different types of economy-related essays,...
Artificial intelligence (AI) has considerably simplified all spheres of our lives, particularly the learning process. ChatGPT and other AI tools can answer almost every question...
The benefits of quality academic education are undeniable, but even the most dedicated students often find themselves unable to eliminate a learning issue that hinders...
Functional gastrointestinal disorders (FGIDs) affect millions of people, yet they’re often misunderstood or minimized because they don’t always show structural changes on tests. The Rome...
Key findings: How many people attend college in the United States? The answer might seem straightforward, but it reveals complex trends shaped by age, race,...
Key findings: How many students receive the President’s Education Award? While this distinction highlights a small group of top-performing students, millions more rely on financial...
Evidence snapshot: Understanding how much teachers earn is essential to grasping the broader challenges within the American education system. As debates around equity, retention, and...
Evidence snapshot: In the ongoing debate over whether college is still worth the cost, one crucial factor often takes center stage: how education translates into...